
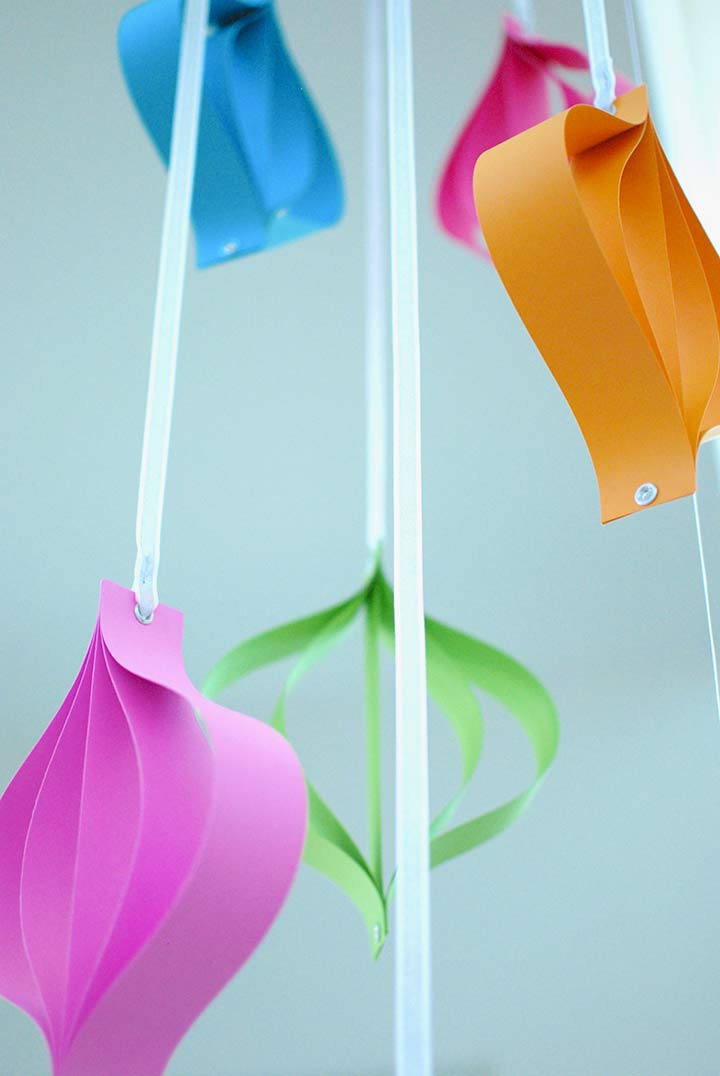
Hey there! Steve and I are splitting our holiday time between sunny Palm Springs and chilly Seattle this year. While we wanted to bring some festive Christmas cheer to our desert retreat, we also needed something quick, simple, and in line with our Palm Springs home’s colorful, mid-century modern vibes. Of course, we turned to Pinterest for ideas (doesn’t everyone?). That’s where we found this awesome tutorial on Curbly for mid-century-inspired paper ornaments. After a few tweaks to make it our own, we ended up with gorgeous, colorful ornaments that are super simple to make but look far from homemade. Let me show you how to make your own. If this is your first time making DIY ornaments, don’t worry—this tutorial is super beginner-friendly!
Supplies You’ll Need for These DIY Paper Ornaments
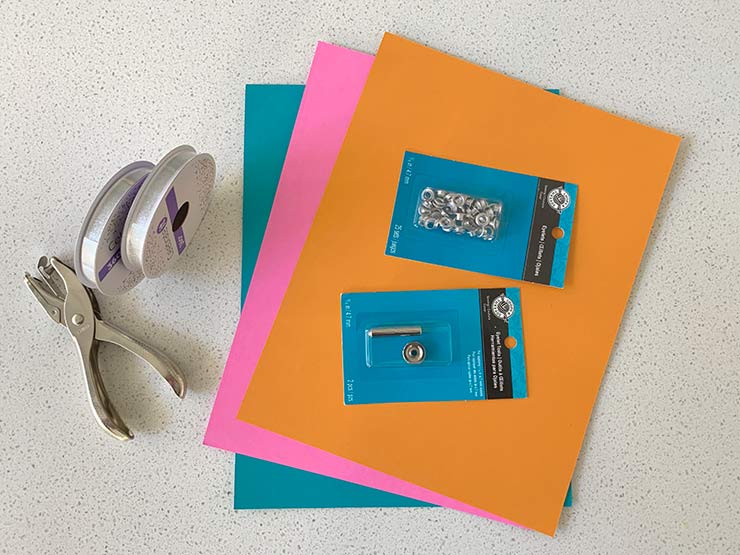
Here’s what you’ll need to whip up your own mid-century modern Christmas decor:
- Colored cardstock or scrapbook paper
- Grommet kit
- Ribbon or a piece of string for hanging
- Hole punch
- Scissors or paper cutter
- Ruler
- Hammer
For consistent shapes, consider using a pre-designed template to guide your cutting.
How to Make Mid-Century Modern Paper Ornaments
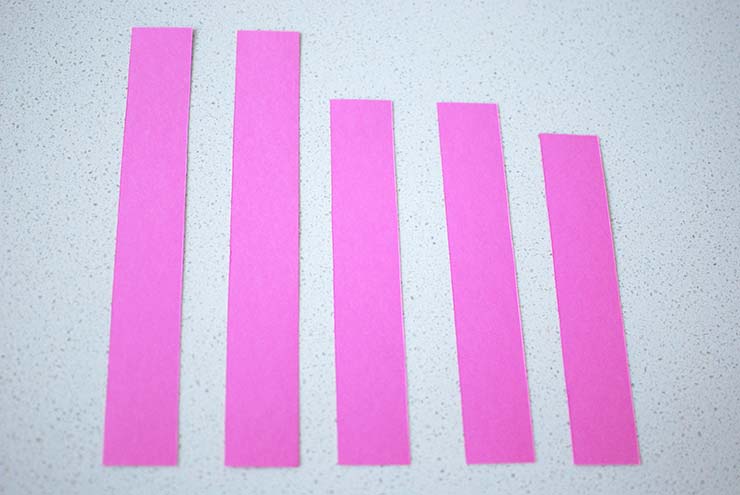
1. Cut Your Paper Strips
Start by cutting your pieces of paper into five strips. You can use a cutting machine if you have one, or just scissors and a ruler. The lengths of the strips will determine the ornament’s shape. For ours:
- Two long strips: 11 inches
- Two medium strips: 9 inches
- One short strip: 7¾ inches. We made each strip 1.5 inches wide, but feel free to adjust it to your liking.
2. Punch Holes in the Ends
Stack the strips and make sure the ends are aligned. Then, punch a hole through all the layers on each end. This ensures your ornament will come together neatly. Don’t forget to re-align the strips if they shift!

3. Layer the Strips
Lay the strips in this order: long, medium, short, medium, long. Spread them out slightly like a fan for easier assembly.

4. Attach with Grommets
Follow the instructions on your grommet kit to secure the strips together at each end. Using grommets gives your ornament a polished, professional look—way better than a line of hot glue or staples!

Once the grommets are in place, you’ll notice how the strips naturally fan out, creating a beautiful shape with the grommets at the center of the ornament.


Tips for Hanging Your DIY Paper Christmas Ornaments
Thread a ribbon or piece of string through the top grommet, which will become the top of the ornament. Secure it with a knot or a dab of hot glue for a neat finish.
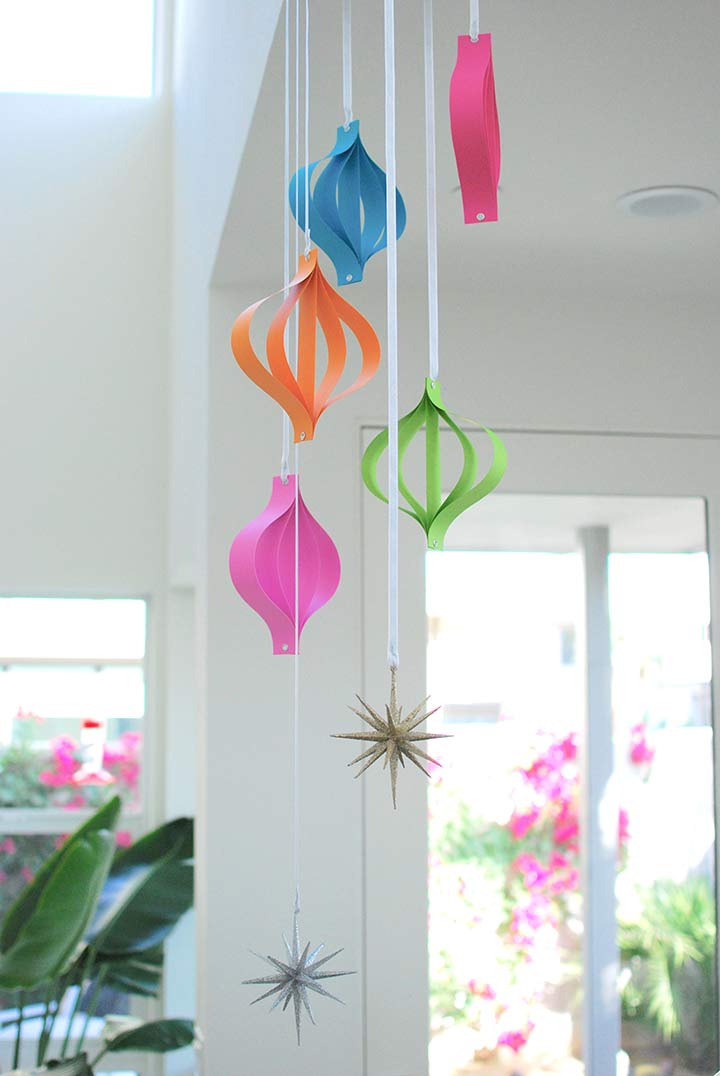
Hang the ornaments at varying heights for visual interest. This is the perfect way to create a stunning display.

Want to jazz things up even more? Add jingle bells or tiny wood beads to the top for a playful touch.

Customize Your Ornaments
These ornaments are incredibly versatile. You can use tissue paper or scrapbook paper for a lighter, more delicate look. Or, for a sturdier ornament that lasts through the years, opt for heavier cardstock. If you’re feeling fancy, cut custom shapes using an SVG file on your cutting machine—think stars, half circles, or snowflakes. The possibilities are endless!
Try layering paper in a honeycomb style for a dimensional twist to create a striking honeycomb ornament effect.
A Few Extra Tips
If you want to avoid the additional cost of buying new materials, check your craft stash first. You’d be surprised what you can make with leftover paper scraps!
Bringing It All Together
To tie everything into our mid-century modern theme, we paired these ornaments with some retro gold and silver starburst decorations. The combination of handmade paper ornaments and shiny vintage accents brought our Christmas decor to life.
So, there you have it—a fun, inexpensive project that’ll make your holidays extra special. Whether you’re looking for a quick craft or a perfect way to add a personal touch to your tree, these colorful ornaments are sure to impress. Now, go grab your glue stick and start crafting! ?
Pssst > We think you will also love our post on 15 Swanky Mid Century Modern Decor Projects and our Modern DIY Christmas Tree using only Lights! Also go check out more DIY Pretty Paper Christmas Decorations over at TBD!

